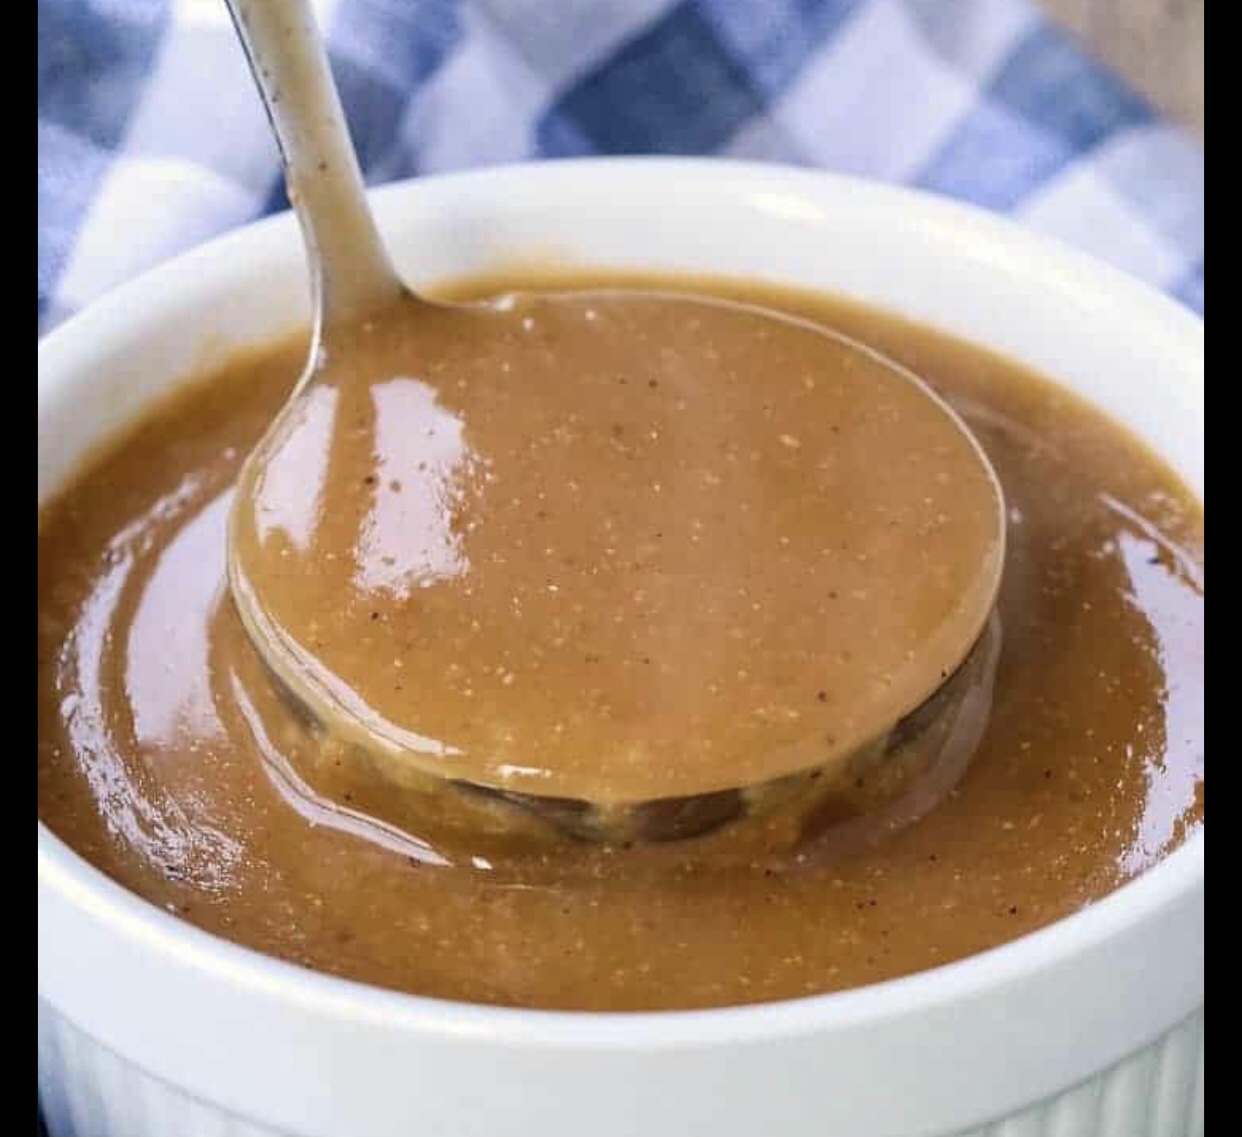
• About WordPress
    • WordPress.org
    • Documentation
    • Support
    • Feedback
  • Log In
  • Skip to primary navigation
  • Skip to main content
  • Skip to primary sidebar

Poultry

Gravy 101

November 25, 2020 by

Easy Gravy

Make Your Own Gravy

Making gravy for any occasion is easy once you know the not-so-secret formula.

Basic gravy is made by adding equal parts of a fat to a thickener then adding a warm liquid.

This recipe makes 2 cups of gravy.
Tools
  • Whisk
  • Liquid Measuring cup
  • Knife
  • Small pot
  • Strainer (optional)
 
Ingredients
  • FAT– butter, oil, bacon, turkey, chicken, beef, etc EQUAL PARTS TO Your Thickener
  • Thickener-Flour or cornstarch (if you use cornstarch your gravy will be light)
  • Warm Liquid – 2 cups of hot, low sodium stock (beef, turkey, chicken, etc)
Recipe
  • 3 tablespoons of beef, chicken, turkey, drippings OR butter —Melted
  • 3 tablespoons of flour stirred into the fat
  • Cook 1-2 minutes to cook the flour
  • Heat the stock
  • Whisk in hot stock gradually and bring to a boil. Whisk the whole time to prevent lumps.
  • The gravy will thicken once it comes to a boil keep stirring.
  • Turn heat to low until ready to serve.
DELISHTIPS
  • If your gravy is lumpy then pour the liquid through the strainer to remove the lumps


  • If your gravy isn’t as thick as you’d like, then make a paste out of a tablespoon of butter and flour in a bowl, add some gravy and whisk the butter-flour mixture until you have a really thick liquid, and then poured that into your gravy and bring to a boil again and it should thicken.

Filed Under: dinner, Dressing/Sauces/Condiments, Kid Friendly, Meat, Poultry, Sauce, Tips & Tricks Tagged With: beef gravy, chicken gravy, Christmas gravy, easy gravy, gravy, holiday gravy, roast gravy, thanksgiving gravy, turkey gravy

Stuffed Zucchini Boats

August 3, 2020 by

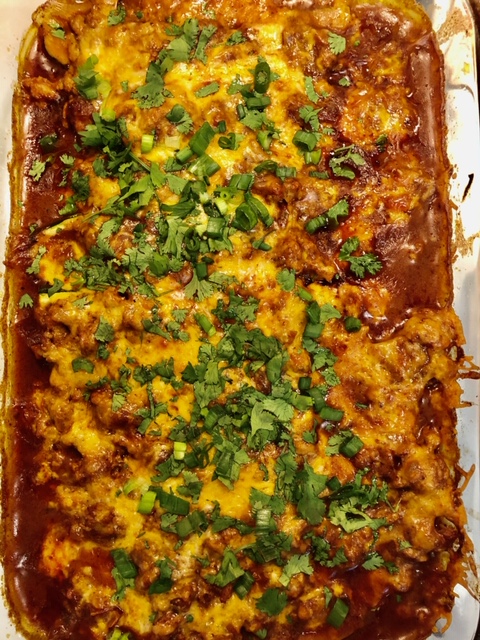
What to with all the fresh zucchini in your garden or at the farmers market? This easy kid-friendly meal will chase away the what’s for dinner summer blues.., and is a healthy use for your abundance of squash.
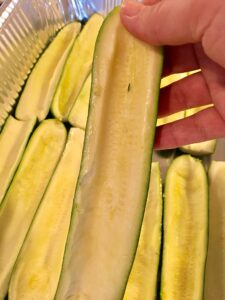
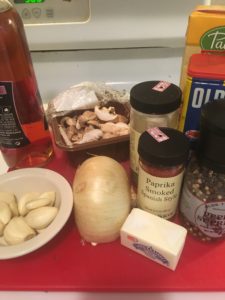
Here’s what you’ll need for these delish Stuffed Zucchini Boats

First, preheat your oven to 400 degrees

Tools

9×13 Baking Pan

Melon Baller- or small spoon to scoop out zucchini

Delish Tip: I like to chop up some of the insides and add it to the ground turkey


Filling Ingredients

  • One pound of ground turkey (85% lean, or lean beef or shredded cooked chicken)
  • One cup of diced onion
  • One tablespoon of garlic
  • One teaspoon smoked paprika
  • One teaspoon of cumin seed
  • One teaspoon of salt and pepper
  • One teaspoon of chili powder
  • 8 oz of shredded cheese like Colby jack
  • 6-7 small zucchini cut in half
  • Chopped Green onions and fresh cilantro for garnishZucchini for boats


Directions

Turkey

Brown the turkey in a tablespoon of oil. Drain if oily. If it’s just juice/broth don’t bother.

Add spices and onion, cook for a few more minutes, and then set aside

ENCHILADA SAUCE

  • 3 tablespoons of olive oil
  • 3 tablespoons flour1 tablespoon chili powder
  • 1 teaspoon cumin
  • 1 teaspoon garlic powder – or fresh
  • 1 teaspoon dried herbs- like oregano
  • 1/2 teaspoon each salt and pepper
  • Pinch of cinnamon
  • 2 tablespoons tomato paste
  • 2 cups of chicken or vegetable broth – low sodium
  • 1 teaspoon of vinegar – any kind

Heat the oil, sauté, or “bloom” the flour and spices. Cook for about a minute.

Stir it in the tomato paste and then pour in the broth and whisk it all together

Bring the mixture to a simmer and cook for 5 to 7 minutes until mixture thickens

Adjust seasoning if you think you need to 😊

STUFF THE BOATS
Place a scoop full of sauce on the bottom of the pan and spread around.

Line up your zucchinis -Delish Tip: I sometimes find it easier to alternate them stem to tail to fit easier.

Stuff the boats with meat mixture.

Spoon a bit of sauce over each boat and top with cheese

Bake

Cover with foil and bake at 400 degrees for 30 minute

Take off the foil and bake for an additional 10 minutes until bubbly and cheese is a little brown.

Stick a knife through zucchini and make sure it pierces easily

Garnish with green onions and cilantro

Enjoy!

Filed Under: Kid Friendly, Poultry, Tips & Tricks, Vegetables Tagged With: easy dinner, fresh, Healthy, zucchini

Braised Chicken Thighs w/ Garlic, Wine and Mushrooms

January 17, 2017 by


I originally made this recipe with Frogs Legs that my husband brought home as a “surprise”. He loves to challenge my culinary prowess.  I researched some recipes online and found one for Frogs legs braised with wine by Duck Dynasty’s Willie Robertson.  He didn’t list any amounts for the ingredients so I made up my own. We don’t eat Frogs Legs often so I use the recipe and techniques on Chicken thighs. You can use this recipe interchangeably with Chicken thighs or Frogs Legs.

Tools                                                                                          

  • Cutting board
  • Metal pan with lid
  • wooden spoon

Ingredients

  • 4-5 Skinless Chicken Thighs,
  • One Bulb of garlic, peeled
  • 2 cups of sliced mushrooms
  • 1 1/2 cups of diced white onion
  • 1 teaspoon of smoked paprika
  • 1 teaspoon of dried herbs
  • 2 teaspoons of Old Bay or Creole Seasoning
  • 1 1/2 teaspoons of salt
  • 1 teaspoon of black pepper
  • 1 cup of No Sodium Chicken broth
  • 1 cup of White wine
  • flour to coat chicken thighs
  • vegetable oil

Recipe

Preheat oven to 300 degrees Fahrenheit. Season your chicken thighs and flour with salt and pepper.  Coat the thighs in flour and pat off excess. Brown the thighs in a few Tablespoons of oil on medium high heat until browned on each side 4 minutes a side. Remove from pan. Add the paprika, dried herbs, creole seasoning, salt and pepper to the oil and stir a minute or so. Add the onion, mushrooms and garlic and stir some more to coat in the herb/oil mixture until the onions start to soften.


Next add the white wine and let evaporate for 3 minutes. Add the Chicken broth and scrape all the brown bits off of the bottom of the pan (they add a lot of flavor to the sauce). Once sauce is at a simmer place the chicken thighs back in the pan cover and place in the oven for 40 minutes. Serve by itself or with rice, pasta, or potatoes.


Filed Under: Poultry

Chicken Pot Pie

January 16, 2017 by

As most of you know, I live in Michigan and weather is often crazy here. The weather can go from 70 degrees to 30 in one day. Today we had snow, rain and ice, changing by the minute. I happened to have some pie crust in the fridge that I had intended to make a pear tart but the fruit got eaten by my daughter before I could make it. So the dough was just sitting in the fridge waiting to be used. My husband requested Chicken Pot Pie today and I thought YES! Today’s weather was a perfect day for it. I hadn’t made it in awhile and I usually use frozen mixed vegetables and you absolutely can but I had the time today so I blanched fresh vegetables today and it came out AWESOME!! I also usually shortcut and use a cooked rotisserie chicken but I poached some thighs today instead in broth. The three of us ate almost the whole pie it was so yummy.

Tools                                                                                                     

  • 8 inch glass pie pan
  • Bowl for mixing
  • Large pan
  • whisk
  • aluminum foil                                                         

Ingredients                                                                                    

  • 1/3 cup of butter/olive oil
  • 2/3 cup of diced onion
  • 1/3 cup of flour
  • 1/2 teaspoon of salt
  • 1/2 teaspoon of pepper*
  • 1/2 cup of milk
  • 1 3/4 cup of Unsalted Chicken stock*
  • 1 1/2 cups of blanched *carrots
  • 1 1/2 cups of diced blanched* fingerling potatoes*
  • 1/2 cup of chopped button mushrooms
  • 1 1/2 cups of frozen peas, thawed
  • 2 1/2 cups of cooked chicken (I like thighs), diced
  • 5 oz of condensed cream of mushroom soup (1/2 can)
  • 1 box of Refrigerated pie dough

Recipe

Take your pie dough out of the fridge and bring to room temperature. Preheat oven to 425 degrees Fahrenheit. In a microwave safe bowl put your chopped carrots and water to cover and cook for 5-7 minutes until carrots are just soft. Drain and put into your large bowl. Do the same thing with the diced potatoes. Drain and put into your bowl. Add your peas, mushrooms and the diced chicken. Melt your butter on medium heat and sauté your diced onion until softened. Add your flour and stir it s few minutes until it smells nutty. Add the chicken stock and milk and stir until thick and bubbly. Whisk in your 5 oz of cream of mushroom soup. pour your filling mixture into the pan and mix well.

The filling should be thick.  Lay one layer of pie dough in your pie pan, pour your filling onto the pie dough. Then top with another layer. Tuck the top layer’s edge under the bottom layer and press to seal. I used a fork to press the edges. Cut a few slits in the top layer so steam can escape. Don’t worry if the pie doesn’t look perfect, it’s homemade! Bake 35-45 minutes until your crust is cooked on the bottom. The last 15-20 minutes put a foil collar around the pie’s edges so they don’t burn. Put some foil on the bottom of your oven in case your pie bubbles some juices out. Let your pie rest at least 30 minutes before you cut it.


DELISH TIP 1: We love pepper in my house you can use less of course. If you use salted stock you won’t need to add a lot more salt.

DELISH TIP 2: Blanched just means partially cooked in liquid. Put about 1/2 cup of water in a microwave safe bowl and microwave your potatoes until softened, about 4 minutes. Then microwave the carrots in the same way for about 5 minutes. Drain both well.

DELISH TIP 3: If you want to use frozen mixed veggies thats fine but thaw them first to get some of the liquid out.

DELISH TIP 4: Any thin skinned waxy potato will work in this recipe.


Filed Under: Poultry

Crispy Skin Baked Chicken Thighs

January 7, 2017 by

As far as I’m concerned, chicken thighs are the best cut of meat on the chicken. They are nearly impossible to overcook and the meat is quite tender and flavorful.  I braise them, stew them, grill and fry them. Most times I remove the skin as it’s not the healthiest for us but sometimes we want that super crispy skin without having to fry. I have been working on a simple recipe to keep the chicken skin crispy  in the oven with no breading and I’ve finally figured it out!  You need to bake the thighs in the upper third of the oven as it’s the hottest part. Also, air drying the chicken in the fridge for at least an hour helps as well. The skin renders out it’s fat and the skin turns into a crispy chicken “chip”, my daughter’s favorite thing.Tools

  • Roasting pan
  • baster

Ingredients

  • 4 Chicken thighs bone-in and skin on
  • 2 Tablespoons of olive oil
  • 1 teaspoon of salt
  • 1/2 teaspoon of pepper
  • 1/2 teaspoon of garlic powder
  • 1 teaspoon of dried herbs

Recipe

Pat the chicken dry with paper towels. place in roasting pan and place in the fridge for at least 30 minutes to several hours. The skin will dry out a bit and that helps to crisp the skin later. Preheat the oven to 425 degrees Fahrenheit. Remove from the fridge and let chicken return to room temperature. Put olive oil all over chicken and sprinkle the dry ingredients on top. Bake thighs for 50 minutes to an hour until Chicken reaches 165 degrees internal temperature. I baste the chicken twice with the oil and juices starting around the 35 minute mark. Let the chicken rest for 5 minutes before serving.


Filed Under: Poultry

  • Page 1
  • Page 2
  • Next Page »

Primary Sidebar

About Me

Welcome to my site!

Follow Me On Twitter

Read More…

Sign Up For Updates

Categories

Let’s Connect!

  • Facebook
  • Instagram
  • Twitter
  • YouTube

Recent Posts

  • Make Dinner Rolls From Pizza Dough
  • Slow Cooker Beef Pot Roast
  • Gravy 101
  • Oreo Truffles
  • Basil Pesto

Copyright © 2023 · by Shay Bocks · Built on the Genesis Framework · Powered by WordPress